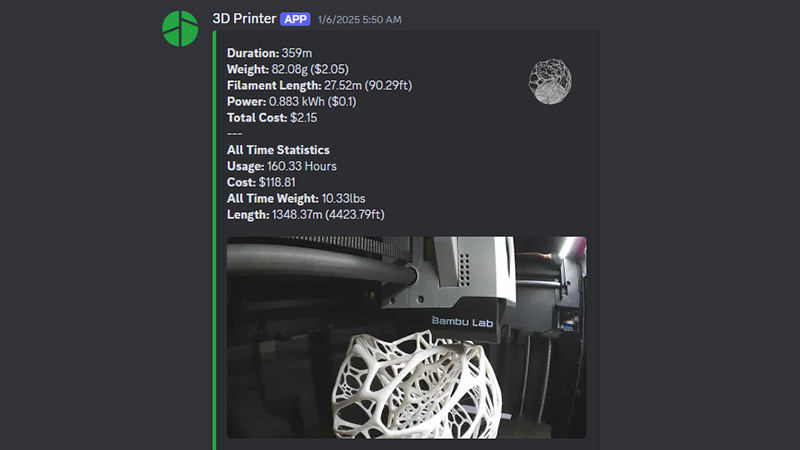
The goal here is to create as accurate as possible cost estimates with Bambu Lab printers and Home Assistant to provide more detailed notifications when a print completes, and curate data analytics of print usage / cost over time.
The beauty of this automation is that it does NOT rely on Bambu Cloud and can run on prints in LAN mode. Prior to the modifications below, you needed Bambu Cloud to view the print weight, and couldn’t get the filament cost based on each filament profile.
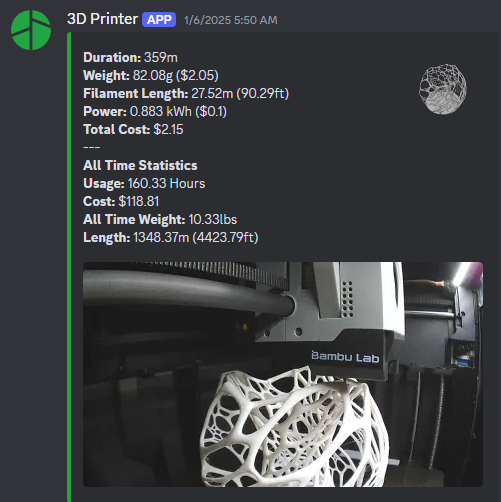
How this works:
When a print starts, the automation detects the printer in “prepare” mode. Using a python script, Home Assistant downloads the current .3mf file from the printer to /www/bblab/ and extracts the gcode preview image / .gcode file. The .gcode file contains the filament type, print weight, length, and cost. These values are parsed and input to number/text input helpers that are created previously. After this, another python script copies the gcode preview image to /www/snapshots/gcode_thumbnails and renames it with a dynamic name to be recalled later on for our data rich Discord message.
Pre-requisites:
– Home Assistant
– Bambu Lab 3D Printer in LAN mode
– Bambu Lab HACS integration installed
– OrcaSlicer (v2.2.0 at time of writing)
– Smart plug with energy monitoring
*For this I used an inexpensive Zigbee compatible smart plug from IKEA that features energy monitoring, and integrates very will with Home Assistant if you have a Zigbee antenna.
Now before creating any automations, we will need some “Helpers” in home assistant.
This is now fairly easy through the GUI by clicking Helpers > + Create Helper. Create the following “Number” helpers and “Text” helpers as detailed.
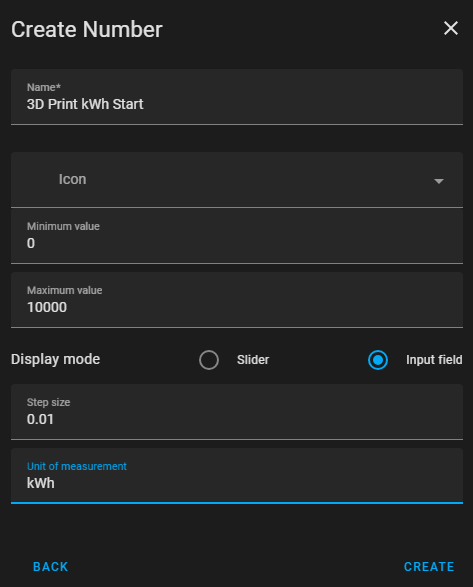
Make sure you set the maximum values high, the display mode as “Input Field” and the step size with an accuracy of 0.01 or more. For currency it makes sense to use 0.01 and for measurements like weight, length etc. use 0.001
Input Numbers:
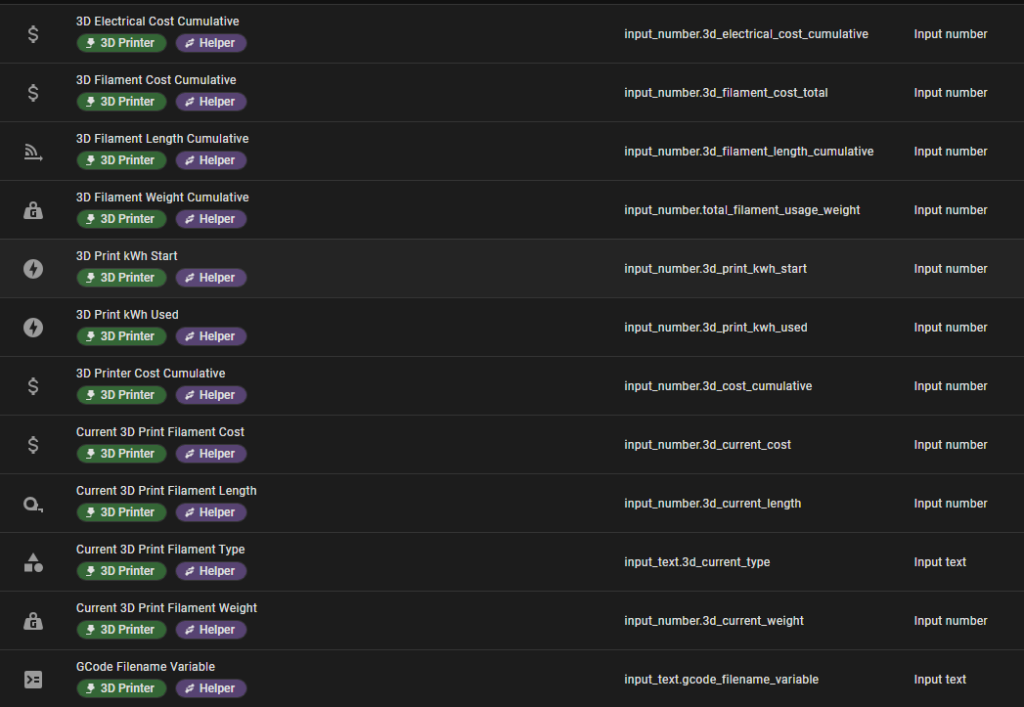
1. “3D Print kWh Start” – Used to capture the kWh usage at start of print
2. “3D Print kWh Used” – Used to display the total kWh used after the print completes
3. “Current 3D Print Filament Cost” – Holds the current gcode filament cost
4. “Current 3D Print Filament Length” – Holds the current gcode filament length
5. “Current 3D Print Filament Weight” – Holds the current gcode filament weight
6. “3D Electrical Cost Cumulative” – Sum of all prints electrical cost
7. “3D Filament Cost Cumulative” – Sum of all prints filament cost
8. “3D Filament Weight Cumulative” – Sum of all prints filament weight in grams
Input Text:
1. “Gcode Filename Variable” – Lets us store a unique gcode filename for each job
2. “Current 3D Print FIlament Type” – Stores the current prints filament type
Example input number:
A quick look at all the created helpers and their respective entity IDs.
Make the necessary folders in /config/
We will need these folders later and to run the necessary scripts.
- /www/snapshots
- /www/snapshots/gcode_thumbnail
- /www/bblab
Download the following gist (Credit to @steveneaston for the original) and save it as combine.py in your /config/ directory on your Home Assistant machine:
https://gist.github.com/coltography/4b0d93e7d3376b8f875d5942a2f3d80b
NOTE: You will need to fill in your respective entity IDs for this to work properly if they differ from mine.
You will also need to fill in your HOMEASSITANT.LOCAL url, and create a long-lived access token to authenticate the script and replace “LONG_LIVED_ACCESS_TOKEN” with your token.
To create a long lived access token, open Home Assistant and click your username in the bottom left sidebar. Click the security tab at the top > scroll to Long Lived Access tokens. Create a token and copy it into your python script.
Now you will need to add some things to your configuration.yaml to use these scripts later:
shell_command:
    capture_gcode_img: "cp /config/www/bblab/cover_image.png \"/config/www/snapshots/gcode_thumbnail/{{ states('input_text.gcode_filename_variable') }}\""


    combine: 'python3 /config/combine.py "{{ printer }}" "{{ access_code }}" "{{ gcode_filename }}"'
Note: You do not need to change anything here, the printer, access code and gcode_filename will be filled dynamically during our automation.
You will also need to add a RESTful command to your configuration.yaml for the Discord notification to work. Before this, make sure you have your Discord channel and Webhook URL setup.
rest_command:
  discord_3dp:
    url: "https://discord.com/api/webhooks/YOUR_DISCORD_WEBOOK_URL"
    method: post
    headers:
      Content-Type: "application/json"
    payload: >
      {
        "username": "Print Completed!",
        "embeds": [
          {
            "description": "{{ response }}",
            "color": 2401603,
            "image": {
              "url": "{{ photo_url }}"
            },
            "thumbnail": {
              "url": "{{thumb_url }}"
            }
          }
        ]
      }
After adding your shell_command and rest_command to your configuration.yaml, restart Home Assistant for them to work properly.
Note: Quick YAML reload will NOT work for this!
For the Automation portion of this you will have to review the YAML and input your own entities as needed.
I tried making a blueprint for this and it just proved to be way too complex for me, having no experience with Blueprints.
The automation.yaml is here:
https://github.com/coltography/Bambu-Labs-3D-Printer-Discord-Notifications/blob/23033d8c97557a8c6331e0de19b6d4fa03246b50/LAN%20Mode%20Bambu%203D%20Print%20Discord%20Notifications
As a reminder, you will need to replace ALL entity IDs and your Home Assistant URLs with your own for this to work.
I have my automation set up to provide Alexa and iPhone notifications as well which you can omit or change depending on your use cases.
I may update this post with a blueprint if I ever figure it out.